Thursday, April 29, 2010

How NOT to Make a Card...


Come listen to a story about a card gone wild...

but first, this is for the Waltzingmouse Challenge, which you can find here.  (You can win 8 stamps sets from the May release (tomorrow!). Please don't enter as it will reduce my chances of winning...

Card Construction Details:

1.  Stamp image from Faux Fun with Versamark on PTI Aqua Mist cardstock.  Trimmed to 4" square.
2.  Stamp Mother (sentiment from Roses in Bloom) with Hawaiian ink on Mulberry paper.
3.  Die cut oval in Aqua Mist cardstock and adhere mulberry to back.

4.  Cannot read sentiment so gently peel back cardstock from oval.  Huge mess.
5.  Distress and ink edges.
6.  Trim Papertrey Ink Hawaiian Shores cardstock to 4 and 1/4" square.  More distressing and inking.

7.  Stamp rose from Roses in Bloom on cream cardstock twice and once on mulberry.  Trim.
8.  Add rose as shown with one layer on dimensionals cause that's what everyone does.
9.  Add pearls ALL the way around oval.

10.  Heat set ivory silk ribbon to curl.  Learn silk ribbon doesn't curl when heat set.  Twist ribbon and tie in vain attempt to create trendy looking old ribbon.
11.  Make separate bow.  Cut off original horrible bow and added new bow with glue dots.  Trim tails too short. Repeat THREE times until bow looks semi decent. Waste huge amounts of expensive silk ribbon.  Good thing husband doesn't read this blog.
12.  Order chinese food as clear no time for cooking.

13.  Stamp different rose on 4 and 1/2" square cream card with Hawaiian Shores ink.
14.  Glue everything.  Is straight in person but looks crooked in picture (??)
15.  Pearls look like tacky Neon Sign.  Pull off most.  Tear cardstock where pearls had been.  Seriously consider selling off all supplies and going to real Hawaiian shores with proceeds.  Cannot bear to start over, proving am not perfectionist.

16. Have dinner with husband.
17.  Tear various parts of card and throw PTI tea dye ink around to look more distressed.
18.  Will give card to my Mom for Mother's Day and expect "Oh, so the tearing is on purpose?"

Mood When Done = Messy

The Wee House

A little late with my post today ~ but here it is :


The house of course is from Irish Blessings, the words from Celtic Heritage, and the little heart from Earth Angel.  All the stamp sets are to be found HERE.

The cardstock and satin ribbon are from PTI and the DP is from Cosmo Cricket and something from my stash ;) .  The image has distressed edges and is mounted on foam.

The image is colored with Prismacolor pencils, blended with Gamsol on Bristol smooth:


Thanks for visiting :) !

Wednesday, April 28, 2010

Happy Mother's Day


I've been in a background-creating mood lately and I made this card using the snowflake image from the "Secret Set" from December 2009. The sentiment comes from Spring Baskets. It's different from butterflies and florals for Mother's Day, but then again, moms are all very different!

Thanks for coming by!
Melissa

"Happy Mother's Day"
Stamps: Secret Set, Spring Basket
Ink: Hawaiian Shores, Melon Berry and Smokey Shadow (PTI)
Paper: Vintage Cream and Melon Berry (PTI)
Other: Pinking shears, foam tape and Melon Berry Satin ribbon

Tuesday, April 27, 2010

Glorious Spring


Stamps: Spring Basket by Waltzingmouse
Embossing Folder: SU
Rick Rack die: Papertrey
Border Punch: SU
Label: Spellbinders Nestie Label

Monday, April 26, 2010

With Gratitude....


Hello!
Isn't it funny when you set out to make a card with an idea in your head & it turns out nothing like you had planned. I had blue & baby in my mind when I started to make this lol!

Supplies: Card: Papermill Uk. DP: WM Celtic Squares, Creme de menthe. Ink: Memento, Rich Cocoa. Markers: Pro Markers. Buttons & Ribbon: My Stash.

Thanks for loooking.

Sunday, April 25, 2010

Bee Happy

I just love those springy little bees. They come from the Lil Buddies set, as does the cute heart circle and sentiment. I colored the hearts with my copics and then used the copics to color the rickrack that I had cut out of PTI white. Everything is mounted on PTI true black. I am pleased with this one, what do you think?

Thursday, April 22, 2010

Stamped Strips

. . . of cardstock can make any kind of card.  In this case, a soft friendly one.  This card has been inside my head ever since I saw a similar one by Michelle Wooderson a while back.

If you decide to try a card like this, I recommend starting with a color palette.  I purposely chose the Angel Pink ink by Memento because I knew I had the PTI Sweet Blush ribbon and the two matched and I LOVE this shade of pink.  From there, I went with Kraft (the Memento Desert Sand ink works well) and green (Memento Pear Tart). 


Since I had soft colors, I selected "friendly" images.  You need small images to stamp them close together or there is too much empty space on your strips.  Or use background stamps. Or save a WHOLE bunch of time and use patterned paper (although I really enjoyed slowing down and making this with stamps).

I took a few photos along the way, mainly for new stampers and because I just felt like it.


And here are the photos I took as I was making the card (3 "quarter" sheets means 3 pieces of 4.25" x 5.5" of cardstock.  In this case, I used PTI Cream, the Memento inks as shown and small images from Waltzingmouse sets Sweetheart (the heart), Irish Blessings (shamrocks) and the hugely popular Very Vintage Christmas (scrolly things):


The dotted frame is from Waltzingmouse Very Vintage Labels 4.  I cut out each of the dotted frames as you can see on my block.  The sentiment is from Sweethearts. 

Mood When Done = Happy

This Old House

Here's my card for today!


I'm having a hard time describing how I made this card because it was one of those times that the whole process was more going with the flow than planning anything out.

I stamped the background with one of the little medallions in a Nestabilities set ~ but I didn't make the background piece big enough.  Hmmm..... by cutting it in pieces, I was able to cover more of the card base so it would show and I think it adds a lot of visual interest.

When I cut the label for the house layer, I left the die in place and also held a smaller die of the same set centered in place and sponged between them.  The next layer down was cut from Papertrey Ink patterned paper and also sponged with the die in place.  These layers are attached with SU foam dimensionals.

Distress Inks were used throughout.  I needed an embellishment, and it turned out that this little flourish from a Basic Grey Chip Board Stickers set, in the Origins collection, is the same color as the Pine Needles Distress Ink that I used for the house and sentiment.  I really needed something to follow the "rules of three" for this color, so that made the design work.

Here's a little closeup:


The Basic Grey Chip Board Stickers are great -- very strong adhesive backing.  Next time, I'll try to be mindful of coloring around the edge of the chipboard ;) !

Cardstock and paper are Papertrey Ink.

Thanks for visiting the Waltzingmouse Makers blog.

Wednesday, April 21, 2010

Happy Birthday


I set out to try another masculine birthday card...they are tough! I also wanted to try something different and geometric. I used a stamp from the Very Vintage Label 4 set to create a background. I went back and stamped some stars from Spring Baskets in each shape. I cut out a label 4 with the die and stamped again, and then stamped the sentiment from Say it with Style. Not my favorite card ever, but it was fun to try!

Thanks for looking!
Melissa

"Happy Birthday"
Stamps: Say it with Style, Very Vintage Label 4 and Spring Baskets (Waltzingmouse Stamps)
Ink: Summer Sunrise, Lemon Tart and Hawaiian Shores (PTI)
Paper: Hawaiian Shores and Stamper's Select White (PTI)
Other: Label 4 Nestabilities Die, HS Twill tape, foam tape, corner rounder

Tuesday, April 20, 2010

Buzz Me!


Stamps: Lil' Buddies
Punch: Martha Stewart
Dies-SU Topnote and Spellbinders Scalloped and regular circle
All patterned papers are Basic Grey
Cuttlebug Embossing Folder
Paper with one adhesive side.

I have found an easy way to do these quilt cards. First I use a square punch and my scrap basket and make 12 squares. I attach the squares to a piece of paper that is sticky on one side. Then I cut the whole thing out with the Top Note Die cut and then I ran it through my Cuttlebug for texture.

Monday, April 19, 2010

Sister


Hello!
Monday again! Weekends fly in.
It's my younger sister's Birthday today, Happy Birthday Louise! I wanted to try & make a funky card for her & I thought this stamp from the 'free Spirit' set was quite funky :)

Thanks for looking.
supplies - Card, Papermill Uk, Stamps, Free Spirit Boy set & Roses In Bloom, Ink, Memento, Lilac Posies, Ribbon & Buttons, LCS.

Sunday, April 18, 2010

Distressing Fun


So I was at the Waltzingmousehouse forum the other day and was reading this fun little thread about distress inks by Tim Holtz. I remembered that I had one distress pad that I had bought ages ago. (Its Brown Corduroy). So I decided to depart from my usual style and make a fun little distressed card. The first thing I did was ink up the Offbeat background grid in Dark Chocolate ink. I stamped it on Lemon Tart cardstock. Next I cut a scallop out of some old PTI patterned paper. Then I took my Vintage Circles stamps and stamped the focal point in dark chocolate. I cut it out with my nesties and then added the sentiment (from Lil Buddies). I added some yellow glitter and dark chocolate twill and of course went to town with the distress ink. Its not my usual style but I think it came out kinda cool. You should stop by the waltzingmouse house forum and see what ideas you pick up on.

Michele (I am Derby)

Card Deets:
Stamps: Vintage Circles, Lil Buddies, Offbeat Backgrounds
Ink: Dark Chocolate (PTI) Brown Corduroy (Tim Holtz)
Paper: Lemon tart, father knows best patterned papers (PTI)
Other: glitter, twill

Friday, April 16, 2010

Oops, no card!

Yikes, I never finished my card.  Hopefully tomorrow. But there is a Waltzingmouse Blog Waltz tomorrow (Saturday). Details here!!

Thursday, April 15, 2010

Simple Sympathy

My card to share with you today is a very simple sympathy card:


I used Zing! embossing powder for the tree from Blessed By You.  For the sentiment, I used a teardrop Memento Rich Cocoa ink pad to partially ink the sentiment from Peace and Plenty .

The cardstock, paper, and Dark Chocolate satin ribbon are from Papertrey Ink.  I added a little pale green half pearl for an accent.  And the image panel is attached with foam.  '

Thanks for looking!

Wednesday, April 14, 2010

Happy birthday

Hope you're having a great week! I have a birthday card to share with you today...I was steering toward making a male birthday card...not so sure if it turned out that way!


I used My Minds' Eye papers in a quilty fashion and stamped the sentiment from Say it with Style . The little scrolly line is from Very Vintage Labels 4 .

Thanks for coming by!
Melissa

"Happy Birthday"
Stamps: Say it with Style , Very Vintage Labels 4
Paper: Kraft (PTI) and My Minds' Eye
Ink: Chestnut Roan (Colorbox)and Walnut Stain (Ranger)
Other: Sewing machine, sponge

Tuesday, April 13, 2010

Happy Home


Sewing Box Hugs are the stamps used on this card. Patterned paper is Basic Grey and the punch is the Martha Stewart Lattice Punch. I am planning to use this card to send to friends who have just purchased a new home.

Monday, April 12, 2010

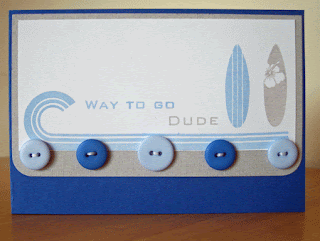
Way to go Dude.............

Hello!
I'm still having fun with this set. I had bother making guy cards before this set came along, so I'm making up for lost time :)

Thanks for looking.

Supplies
Stamps - Free Spirit, Ink - Versa Color - Chateau gray & Sky blue, Card - Papermill UK, Buttons - my stash.

Sunday, April 11, 2010

So Happy to Be Here!


Hi!! Its my first post here on the Waltzingmouse Makers Blog. I am so excited to join the team here, I literally jumped up and down when Joan asked me to join. Let me tell you a little about myself. My name is Michele, but I go by DerbyLea on the various crafting boards I frequent. I am a middle aged mom of two grade school aged kiddos. I teach science at an elementary school in Northern California. I have loved art since I was a small kiddo. I originally intended to go to art school and draw for a living (ha! I would probably be living in a cardboard box). My parents encouraged me to do something that would be more likely to pay the bills (hence, teaching). Anyway a few years back I moved from scrapbooking to stamping and here I am, very happy to be making cards and creating a paper-filled mess on a daily basis. I "met" Miss Claire on a message board and have long been a huge fan. You can read my raves about her stamps here, here, and here. I love her and her classic style! I also post on my own blog, I Am Derby. Ok, enough babble about me... on to the goods...
Don't you just love this basket? This is one of my favorite stamps from Waltzingmouse. I love how tall and elegant it is. These stamps are all from the Spring Baskets set. They are a joy to work with, full of fun options and great sentiments!
Card Deets:
Stamps: Waltzingmouse Spring Baskets
Paper: PTI Aqua and Hawaiian shores
Ink: Palette (Dark Chocolate). PTI Hawaiian Shores
Other: Button (pti) Copic markers, rickrack die (pti)

Thursday, April 8, 2010

Big Hugs

Here's a fun bright card that's easy to make.  I found the layout in the Papercrafts Go To Sketches magazine.  Enjoy!


I had some flowers stamped and cut, just waiting to be used.  I gathered them up, and die cut (8 times) Vintage Vogue Moss felt with a circle nestability die to place under each flower.  Punched a hole through the flower and the felt and adhered with an SU brad.  Adhered each circle with a dimensional. 

Stamped a sentiment from Sweetheart and was done!

Supplies:
Stamps:   Waltzingmouse Sewing Box Hugs and Sweetheart
Cardstock:  SU Textured Only Orange, PTI Raspberry, Hibiscus and White
Ink:  Versamark, SU Always Artichoke
Other:  Moss Felt, White embossing powder, dimensionals, nestability circle die

Size of card:  A2


Birthday by Nature

For today's card, I used Nestie Eggs and Earth Angel stamp sets:


Don't you just love stamp sets that multitask?  And Easter eggs for any time of the year are a perfect example!

Cardstock:  Papertrey Ink Ocean Tides and Dark Chocolate
Designed Paper:  Webster's Pages
Ink:  Memento Rich Cocoa and shades of Versamagic; Papertrey Ink Chai Tea for distress sponging
Other:  Brad by Basic Grey; foam mounts under the panel with the eggs (hard to see with the two light sources needed on a gray day!)
note:  The little stamp under the sentiment is a flourish from one of the Nestie sets.


I am madly in love with Webster's Pages ;) .

Wednesday, April 7, 2010

With Love

Happy Wednesday!

Here is my card to share today:


I used the set Very Vintage Label 4 for the frame and the sentiment comes from Say it with Style . I chose to make a pocket-style card and decorated it with papers from My Minds' Eye. Lots of stiching, a ribbon and some twine finish it off!

Thanks for stopping by!
Melissa

"With Love"
Stamps: Very Vintage Label 4 and Say it with Style
Ink: Pink and Green (Colorbox), Walnut Stain (Ranger)
Paper: Vintage Cream (PTI), patterned paper (My Minds' Eye)
Other: Ocean Tides satin ribbon, Rustic Cream twine, sewing machine, 2 " circle punch, foam tape

Tuesday, April 6, 2010

Basket of Stitched Flowers


All stamps by Waltzingmouse. Border is Fiskars. I made the "basket" with a Waltzingmouse background stamp.

Monday, April 5, 2010

Free spirit..................

Hello!
Happy Easter Monday to you all.
I have a lot of male birthdays coming up in my family so I made today's card for my little nephews birthday. I used the wee racing car stamp from WM new 'Free Spirit Boy set & Free Spirit sentiment set'
I'm having so much fun with these sets.

I'm off out now with the family now to roll our eggs, I love the Easter holidays.

Thanks for looking.

Saturday, April 3, 2010

Happy Easter!


This was a fun card to make. Borders are done with SU and EK Success punches. Background is an SU embossing folder and I wiped white ink over it after it was embossed. The background on top of the purple layer was done with a stamp from Faux Fun and the main image and sentiment are from Lil' Buddies. All stamps are Waltzingmouse! (note, I like to cut my sentiments apart to stamp with).

Happy Easter


Friday, April 2, 2010

Glorious Spring

Today I'm sharing a card with the cute trio of flowers and a great sentiment from Spring Baskets. 


Card Construction Details

1.  Stamped flowers, colored with Copics.
2.  Stamped sentiment and cut out piece as shown.
3.  Added clear buttons.
4.  Die cut rick rack.  Since I do not have Copic markers that are a good match to the Spring Moss cardstock, I colored a piece of the Spring Moss after I die cut it to match the leaves on the flowers.
5.  The three rick rack strips turned out to be harder to adhere than I expected and I ended up ruining the first white card I used (too much tape, so it showed under the rick rack).
6.  So, I cut the white off the bottom of the card and substituted some pink cardstock.  Bingo! Liked it better anyway.
7.  Adhered flower panel with dimensionals.
8.  Rounded bottom of card.

Mood when done = Glorious


Supplies

Stamps:  Waltzingmouse Spring Baskets
Cardstock:  PTI:  White, Hibiscus, Spring Moss and Summer Sunrise
Ink:  Memento Tuxedo
Other:  Copics, PTI Rick Rack Die, We R Memory Keepers Corner Chomper, clear buttons and twine